HOW TO ADD A BLOG POST
STEP 1.
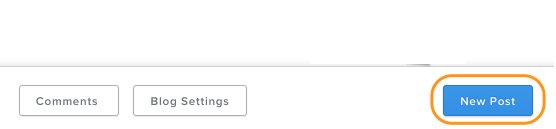
To create a Blog Post, click on the 'New Post' button at the bottom of your blog page.
(Your blog page will generally be labelled 'News' or 'News & Events' page)
(Your blog page will generally be labelled 'News' or 'News & Events' page)
STEP 2.
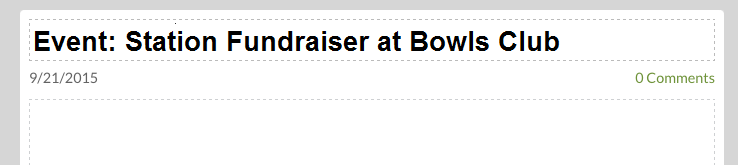
Add a title - the blog post template will open on your page with an automatic title and content area.
Good practice for writing blog post titles is to note which category the post falls under, for example:
Good practice for writing blog post titles is to note which category the post falls under, for example:
- Event: Trivia Night Fundraiser- June 7th
- Station News: Studio B Upgrade
STEP 3.
Add content by dragging and dropping elements from the sidebar into the post, and editing the elements.
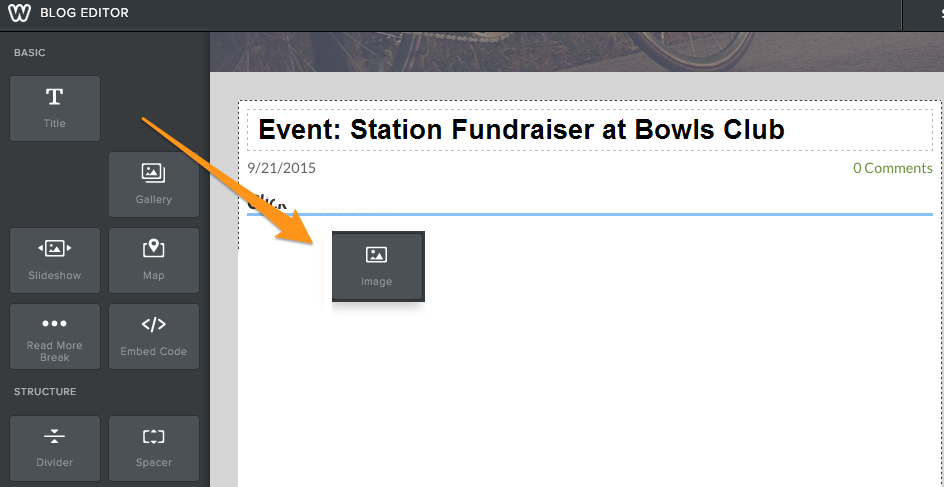
IMPORTANT: You must include an image in each blog post so that the 'Latest News' widget on the home page displays an image. If you do not add an image to your blog post, the widget will draw a fallback image which is generally the station's logo.
HANDY HINT:
Drag a text box over the top of an image until a blue block appears across the image. (see below)
This will shrink the image and place it inline, next to the text.


STEP 4.
Once you have added your elements and are happy with your post,
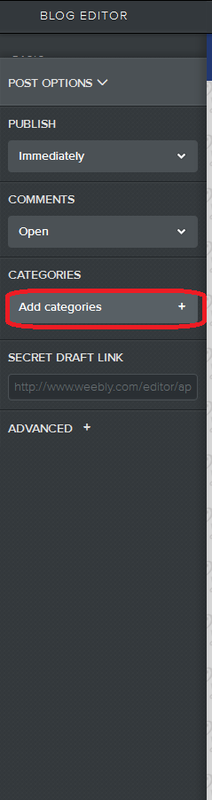
click 'Post Options' in the bottom left hand corner of your screen.
click 'Post Options' in the bottom left hand corner of your screen.
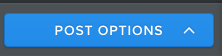
Click 'Add Categories' to tag your post. (see left hand image below)
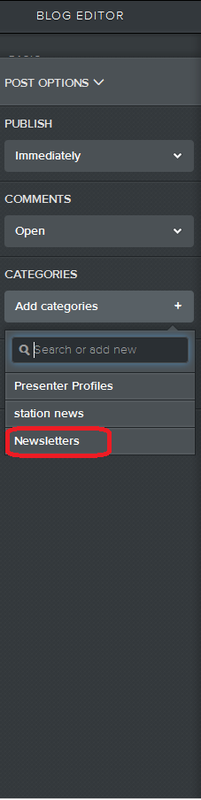
Either add a new category by typing it in, or selecting a category from the list that appears.
(see right hand image below
We recommend you keep this list small, with the categories covering a broad range of items.
IMPORTANT: Ensure you tag each post with at least one category. Category feeds are pulled to different pages on the website. eg. the Events page on your site will pull a feed of all the blog posts on your site that have been tagged as 'Events'
|
|
From here, you can also schedule your post to publish at a later date and time, and turn comments on or off.
STEP 5.
Once you have tagged your post and you're ready to publish, click the orange 'Post' button in the top right hand corner of the editor.

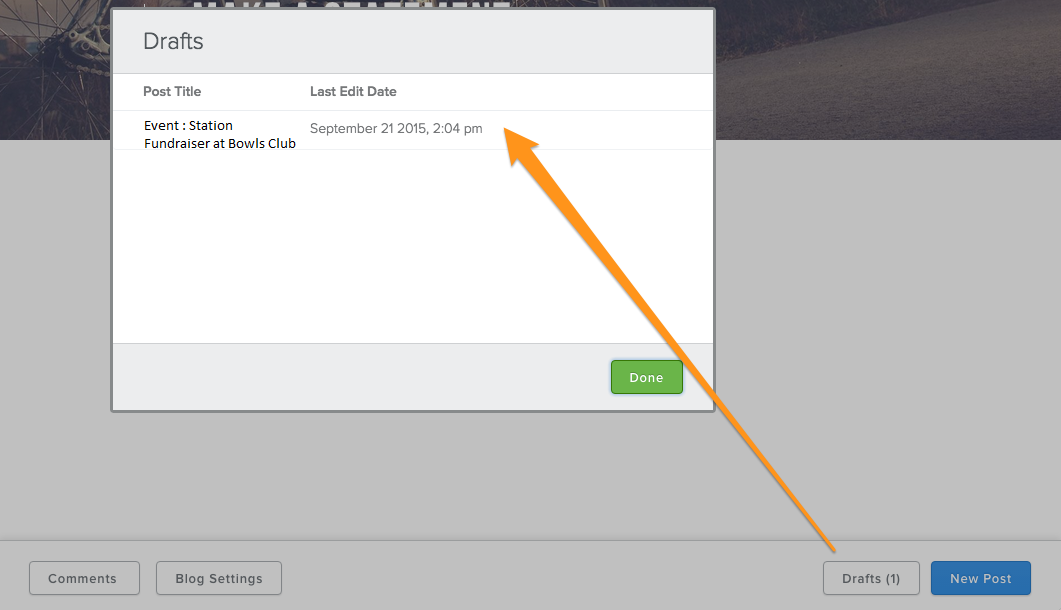
'Alternatively, if you need to save the post as a draft and come back to edit it at another time, you can click the 'Save' button next to the 'Post' button.
When you click Save, you’ll see a 'Drafts' button is added to the lower right. Clicking Drafts lets you view all your works in progress to edit and post them when you’re ready.
When you click Save, you’ll see a 'Drafts' button is added to the lower right. Clicking Drafts lets you view all your works in progress to edit and post them when you’re ready.
STEP 6.
To publish the article to the site, be sure to click the 'Publish button in the top right hand corner after you have clicked the 'Post' button on your article.